
6 bright ways LED lighting supports workplace productivity.


Calculate your LED lighting energy savings.
Upgrading inefficient metal halide and fluorescent fixtures to LED lighting can deliver strong financial returns along with meaningful operational benefits. Before we jump into six surprising benefits of LED lighting, let’s take a moment to consider the financial benefits: By implementing a comprehensive upgrade, you can enjoy energy savings of up to 75% with a payback period as short as 6-10 months. Consider this hypothetical example: A standard 1,000-watt metal halide fixture with ballast consumes 1,150 watts annually, generating over $500 in electricity costs based on 12-hour daily operation at $0.10 per kWh. Over five years, that single fixture costs more than $2,500 to operate. By comparison, a 300-watt LED replacing a 1,150-watt metal halide system not only provides similar or superior light output but also costs about $130 per year to operate. That’s approximately $650 over five years, for a savings of around $1,850. Please note: These figures do not represent your actual savings and are intended for illustrative purposes only.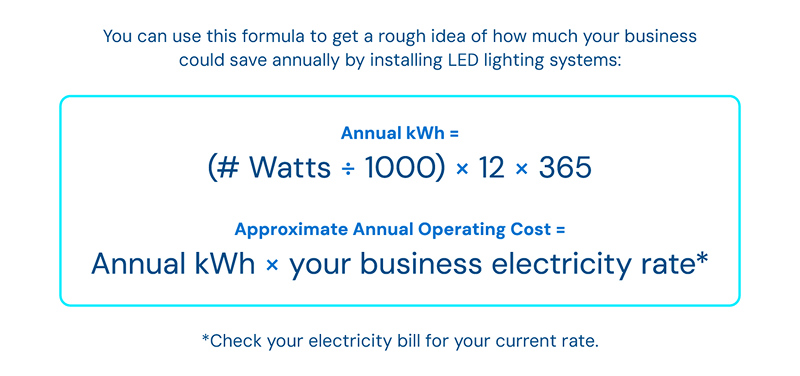
1. Improve focus and reduce fatigue.
Dim lighting can cause drowsiness and strain the eyes. On the other end of the spectrum, a well-lit space can reduce eye strain and fatigue, leading to a more focused and engaged workforce (HR Future). When task areas are well-lit, your employees may make fewer errors and complete visual tasks more quickly. Offices, workshops and retail floors all benefit when light levels are matched to the task — as an example, fine assembly or inspection areas need higher illuminance than a breakroom.2. LEDs may boost productivity.
LED lights often come equipped with features designed to adapt to the needs of your business. Dimmability options, color temperature flexibility and compatibility with smart lighting systems add to the appeal of LED lighting. Good lighting conditions and controls contribute to a more vibrant work environment, which can significantly boost employee morale and efficiency. Tasks are completed more accurately and quickly when employees are happy, comfortable and can see clearly, leading to higher quality work and increased productivity.
Sources: epa.gov; hrfuture.net; pecnw.com
3. Daylight and circadian-aware lighting improve wellness, sleep and alertness
Natural daylight synchronizes circadian rhythms — that’s your internal clock that regulates sleep, alertness and mood. Research shows that employees with good daylight exposure or LED lighting adjusted to the daylight spectrum report better sleep, higher alertness and improved well-being. Newer “circadian-effective” lighting systems provide blue-enriched daytime light and dimmer, warmer light in the evening that can extend those benefits indoors. It stands to reason that healthier, better-rested employees will be more engaged and productive. How much can you save? Calculate your potential savings from incentive-eligible energy upgrades from TVA EnergyRight Business and Industrial Team and your local power company.
4. Improved lighting may lead to a reduction in workplace accidents and injuries.
On shop floors, loading docks, kitchens and construction sites, inadequate lighting increases the risk of slips, trips and costly errors. Industry Today reports that “Poor visibility is the leading cause of slip, trip and fall hazards and contact with moving objects — some of the biggest risks in any facility. LED fixtures produce bright, white, uniform light that improves visibility, and helps workers spot hazards and stay out of harm’s way.”5. LED lighting can improve employee comfort.
Compared to incandescent bulbs, which release 90% of their energy as heat, and compact fluorescents, which release 80% of their energy as heat, LEDs emit very little heat energy. This efficiency enables better temperature control in workplaces, which can improve both comfort and safety for your team. Reducing heat waste fosters a more pleasant workspace and decreases the cost of air-conditioning. And finally, the reduced heat output may also contribute to a lower risk of overheating in electronic devices and other critical systems, thereby extending their lifespans and reliability.6. Brighten your customers’ experience with the LED lighting.
If productivity extends to customer experience (and we think that’s a pretty easy case to make), then it’s worth noting that LED lighting can actively shape how your customers feel the moment they walk through your business’s door. For some retailers, bright lighting makes products look sharper and more appealing. For others, softer tones can create an inviting, comfortable atmosphere that encourages guests to sit back, relax and enjoy the moment.How TVA EnergyRight and your local power company can help.
For more tips and free energy-saving items such as a smart thermostat, smart plug, weatherstripping and more, request a Smart Energy Starter Kit. Some businesses may even qualify for free LED tubes!
How to make HVAC and heat pump upgrades work harder for your bottom line.
For small and medium-sized businesses, every operational decision needs to pull its weight. Upgrading your HVAC system or installing a high-efficiency heat pump isn’t just about keeping your employees comfortable (although that’s important, too!); it’s a strategic investment that can reduce operating costs, improve productivity and protect your business from rising energy expenses.
When designed, installed and operated correctly, modern HVAC and heat pump systems can become some of the most reliable contributors to your bottom line. Here’s how to make sure your upgrade works harder for your business, not just your building.
Source: U.S. Energy Information Administration
Start with your business’s needs, not the equipment.
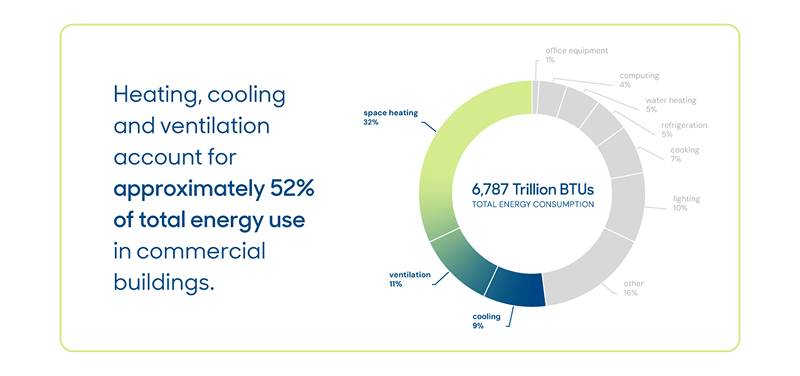
Heating, cooling and ventilation account for over 50% of total energy use in commercial buildings. For many small to medium-sized businesses, inefficient HVAC systems quietly drain thousands of dollars each year through inefficiencies, wasted energy and frequent maintenance calls.

Here are 10 strategic, ROI-driven questions you can ask as you think about upgrading your HVAC system.
- What are my annual heating and cooling costs?
- How much do I spend on annual maintenance and repair?
- How often do breakdowns disrupt operations (and how much does that cost me)?
- How long do I plan to occupy the space?
- How old is my existing HVAC system?
- What is the installed cost vs. annual energy savings?
- Are hot or cold spots affecting productivity or customer experience?
- Are there incentives available to help offset the cost?
- Can zoning, smart thermostats or building controls reduce run time?
- What is the lifecycle cost over 10-15 years?
For many small and medium-sized businesses, a three-to-five-year payback is strong. Longer payback periods can still make sense if comfort and reliability gains are significant. And remember, HVAC incentives can dramatically reduce payback periods and improve ROI.

By framing HVAC upgrades as an operating expense reduction — not just a capital cost — you can evaluate options based on payback period, lifecycle cost and long-term savings.
If you lease your space, it may be worth having a conversation with your landlord about HVAC upgrades. Check out “How to talk to your landlord about energy upgrades” for a few conversation-starters and tips.
Pair equipment upgrades with supplemental energy efficiency measures.
Even the most efficient HVAC system can underperform if your building isn’t optimized for energy efficiency.
If you have access to your building ducts, make sure they’re well-sealed and insulated. Use caulk and weatherstripping to seal gaps around your building’s doors and windows. Consider installing LED lighting to reduce heat emissions and lower your air conditioning costs in the summer.
As you consider HVAC systems, you’ll also want to think about how smart thermostats, zoning controls and occupancy sensors may help ensure that energy isn’t wasted by conditioning empty spaces.
For more tips and free energy-saving items such as a smart thermostat, smart plug, weatherstripping and more, request a Smart Energy Starter Kit.

Choose high-efficiency HVAC technology.
Modern HVAC and heat pump systems are designed to deliver more output using less energy. As you consider your options, look at the SEER2 ratings. SEER stands for Seasonal Energy Efficiency Ratio, and the higher the SEER2 rating, the more efficient the system. Check out our SEER2 FAQs for more information.
Other important efficiency features to consider include:
Variable-speed technology
Unlike older single-speed systems that cycle on and off, variable-speed systems adjust output in real time. This means:
- Lower energy use during mild weather.
- More consistent indoor temperatures.
- Reduced wear and tear on components.
Heat pump technology
Heat pumps move heat inside during the winter and outside during the summer. Because heat pumps move heat rather than generate it, they can operate with significantly higher efficiency than conventional heating and cooling systems.
Unlike a conventional furnace, which generates heat by burning gas or oil, a heat pump extracts heat from the air, ground or water. Heat pumps provide both heating and cooling using electricity, making them especially effective in the TVA region. Benefits include:
- High efficiency in moderate climates (such as our seven-state Tennessee Valley region).
- Fewer carbon emissions.
- Lower maintenance needs compared to traditional systems.

Improve ROI with HVAC incentives.
One of the fastest ways to improve the financial performance of an HVAC or heat pump upgrade is by taking advantage of available incentives.
TVA EnergyRight and your local power company are offering incentives on unitary A/C units and heat pumps, air-cooled chillers, VRF heat pumps, dual fuel heat pumps and ground source heat pumps.
These incentives can significantly reduce up-front costs and shorten payback periods.
Before purchasing equipment, be sure to identify a qualified contractor familiar with TVA EnergyRight incentives to ensure that your project qualifies.
Take care of your investment.
Many modern HVAC systems offer built-in monitoring or integration with building management systems, allowing you to track performance and identify opportunities for optimization.
Consistent monitoring may also help prevent small issues from becoming costly breakdowns and contribute to keeping your energy costs predictable. Ask your contractor about annual maintenance and seasonal performance checks to keep your new investment operating at peak efficiency.
Factor in the unexpected benefits of an HVAC upgrade.
While energy savings are fundamental to your decision, comfort also has a direct impact on business performance and asset value.
Spaces that are too hot or too cold can lead to reduced employee productivity, increased complaints, more downtime and negative customer experiences. On the other hand, efficient HVAC systems maintain stable temperatures and promote better indoor air quality, creating a more comfortable environment for both employees and customers.
Over time, this can translate into higher productivity, better employee retention and stronger customer satisfaction. These benefits don’t always show up on an energy bill — but they absolutely affect your bottom line.
In addition to comfort and customer experience, HVAC upgrades can increase your property’s value, improve resale or lease value and contribute to a stronger asset balance sheet.
Plan now to avoid stress later.
Often we wait until our current HVAC system fails and then make a rushed decision to replace it. If your system is more than 10 years old, now is the time to plan ahead and decide what to buy. Run the numbers on a high efficiency system with your favorite experts and explore the incentives available. When failure occurs, you’ll be prepared to make a smart decision.
Keep the big picture in focus.
Upgrading your HVAC system can:
- Lower energy costs.
- Reduce maintenance and downtime.
- Improve comfort, productivity and customer experience.
- Strengthen your asset value.
- Enable you to take advantage of financial incentives that accelerate payback.
TVA EnergyRight for Business & Industry helps small and medium-sized businesses make smart energy decisions that reduce costs, improve performance and support long-term success.
When your HVAC works better, your business does, too.
Are your compressed air systems the hidden energy drain in your facility?

Compressed air is one of the most widely used utilities in industrial facilities — and one of the most expensive to operate. Because it operates quietly in the background, inefficiencies often go unnoticed until energy costs start to rise and equipment performance declines. For many facilities, aging compressed air systems are consuming more energy than necessary, creating an opportunity for smarter upgrades.
The good news: Modernizing compressed air systems for efficiency doesn’t have to mean over-the-top capital costs. With new Fast Track Compressed Air incentives, custom incentives and free online training, TVA EnergyRight® is helping industrial facilities address inefficiencies, plan upgrades strategically and improve long-term performance.
Why compressed air system efficiency deserves a closer look.
Compressed air plays a critical role in manufacturing, powering pneumatic tools, processing, packaging and material handling. But it’s also one of the least efficient forms of energy. Compressed air is an on-site-generated utility, and it is also one of the most expensive sources of energy in a plant. The overall efficiency of a typical compressed air system can be as low as 10%-15%.
Studies show that up to 30% of compressed air energy may be wasted in aging, improperly sized or poorly maintained systems. Because this waste accumulates gradually, it often goes unnoticed during day-to-day operations.
Even small issues can add up quickly. For example, a quarter-inch air leak operating at 100 psi can waste more than $2,500 in electricity each year. Across an industrial facility with multiple compressors and extensive piping, those losses can add up fast.
Unlike other utilities, compressed air inefficiencies don’t always present as a single failure. Instead, facilities may experience creeping energy costs, declining system responsiveness or increasing maintenance demands. That means that the system is working harder than it should, and that work consumes extra energy, costing you more.
Sources: energy.gov; gasoutlook.com; usaircompressor.com
The real cost of aging compressed air systems.
Many industrial facilities still operate compressed air systems installed years or even decades ago. While these systems may still function, their efficiency and performance often decline over time.
Challenges include:
- Increased energy consumption to deliver the same air output.
- Higher maintenance costs and unplanned downtime.
- Equipment running outside optimal load ranges.
- Running a system at a higher pressure than necessary.
- Difficulty justifying upgrades without clear financial support.
As production needs change, older systems are often left mismatched to current operations, resulting in excess energy use and reduced reliability.
Source: energy.gov
Where energy losses typically occur.
Compressed air energy efficiency isn’t limited to one component. Instead, it’s usually the result of a combination of system-level issues, including:
- Outdated compressors operating inefficiently under partial or excessive loads.
- Inefficient air treatment and filtration, increasing pressure drop and energy demand.
- Poor system controls or sequencing, leading to unnecessary run time.
- Equipment sized for past production needs, not today’s operating reality.

Addressing these efficiency issues requires more than maintenance. It often requires strategic system upgrades. And that’s where industrial energy incentives with TVA EnergyRight and your local power company come in. Here are three tools you can use to upgrade your compressed air system’s energy efficiency.
Source: energy.gov
Smarter compressed air starts here.
1. Fast Track Compressed Air incentives: A smarter path to upgrades.
To help facilities move forward with necessary improvements, TVA EnergyRight offers Fast Track Compressed Air incentives designed to reduce the up-front cost of new equipment and specific parts replacements, such as condensate drains and engineered air nozzles.
These incentives:
- Lower costs for compressed air component upgrades.
- Simplify the incentive process to speed up upgrades.
- Support improvements that enhance efficiency, reliability and performance.
Fast Track Compressed Air incentives help turn required upgrades into smarter business moves with a clearer ROI.
Learn more about our Fast Track Compressed Air incentives and see how you can start saving.
2. Custom incentives for full system replacements.
There is a lot of flexibility with custom incentives. For targeted improvements with existing compressed air systems to full replacements, custom incentives provide flexible support based on project scope and energy savings.
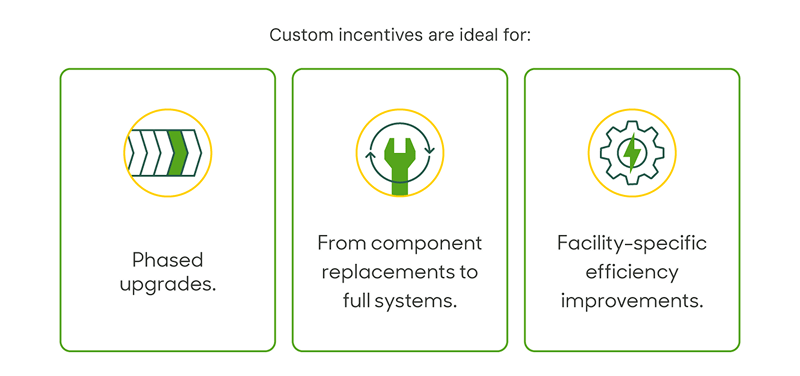
This approach allows facilities to modernize strategically — aligning improvements with operational needs and capital planning timelines.
To learn more about custom incentives, connect with a TVA Energy Expert.
3. Build in-house expertise with Compressed Air Training
Incentives are most effective when paired with knowledge. The first step for any compressed air system is to optimize existing equipment. That’s why TVA EnergyRight offers a free online Compressed Air Training course with two 4-hour sessions, valued at more than $400.
The course is designed for facility managers, engineers and energy professionals. It focuses on:
- Practical strategies that can be implemented immediately.
- Understanding system performance and optimization.
- Identifying opportunities for ongoing energy savings.
Facilities that apply these strategies typically save 15%-25% on annual energy costs, making training a powerful resource alongside system upgrades.
Learn more or register for our Compressed Air Training webinar here.
From cost center to competitive advantage.
TVA Energy Experts can help your facility navigate this process by providing proven pathways that support smarter planning, stronger performance and long-term results.
When compressed air systems are modernized and well managed, they do more than just reduce energy costs. They support productivity, improve reliability and give facilities greater control over operating expenses. With the right mix of incentives, training and expert guidance, compressed air can shift from a hidden cost to a strategic asset.
Ready to start? Here’s how.
Optimizing compressed air systems can cut energy use, lower operating costs and boost efficiency. Connect with a TVA Energy Expert to see how we can help your facility cut costs and save more.
Essential energy upgrades: Your complete guide to duct sealing, air sealing, insulation and HVAC maintenance.

Welcome to your home efficiency playbook.
Index
Click on the links to jump to the sections that are most relevant to you and your home.
- Introduction
- Chapter 1: Duct sealing
- Chapter 2: Air sealing (AKA: Home envelope sealing)
- Chapter 3: Insulation
- Chapter 4: HVAC Maintenance
- Chapter 5: How to hire a qualified HVAC contractor
- Glossary
Whether you’re a renter, homeowner or landlord who’s considering upgrading aging systems, understanding the fundamentals of home energy efficiency is important. We’re working closely with local power companies throughout the seven-state Tennessee Valley region to help people like you lower your energy bills with energy-saving recommendations, rebates and more.
Although we often think about each of these systems individually, they all work together to improve comfort, protect indoor air quality, lower your monthly heating and cooling costs, and extend the effective lifespan of your HVAC system.
That’s why we’re taking this opportunity to put everything you need to know about duct sealing, air sealing, insulation and HVAC in one place for easy reference. We hope you’ll find this comprehensive playbook useful and share it with your neighbors!
As you read through this guide, you’ll find expert-backed tips from energy authorities like ENERGY STAR, the U.S. Department of Energy (DOE), the U.S. Environmental Protection Agency (EPA), research publications and building-science standards from Air Conditioning Contractors of America (ACCA). Feel free to click around and keep on learning from trusted sources.
And don’t forget duct sealing, air sealing, insulation and HVAC maintenance all qualify for rebates from TVA EnergyRight and your local power company.
Chapter 1: Duct sealing.
Why duct sealing matters.
Wasting energy before it enters your home is hard on your home energy bills — and your personal comfort. Unfortunately, it’s an incredibly common way for energy loss to occur. Research shows that leaky ducts can lose a staggering amount of conditioned air — up to 30% — as it travels through the system.
Not only does this waste lead to higher energy bills, but it also means your HVAC system is working much harder than it needs to. Ducts leaking just 20% of conditioned air passing through them can cause your heating and cooling unit to work 50% harder!
Reading the signs.
What you can’t see can hurt your energy bill. For the most part, your home’s ductwork won’t be visible to you. However, just because you can’t see a crack or feel a leak doesn’t mean your home won’t give you some helpful signs that maintenance is needed. If any of the following symptoms sound familiar, it may be time to consult with your local heating and cooling expert.
- Higher-than-normal or unpredictable energy bills.
- Difficulty maintaining your desired temperature.
- Hot or cold spots or drafty rooms.
- Noticeable dustiness.
- Whistling or whooshing sounds when your HVAC runs.
- Dirt, dust, mold or condensation around air vents.
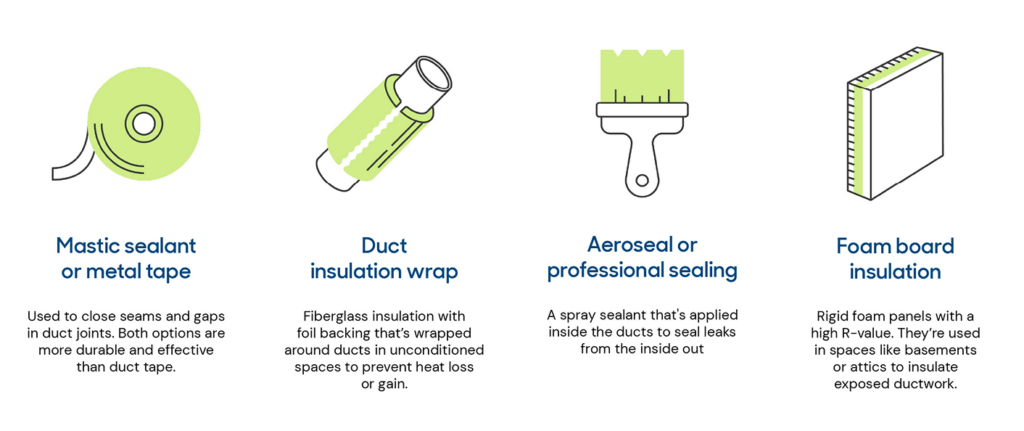
It may be tempting to run to your local hardware store and grab a roll of standard duct tape (quick note here: mastic sealant or metal tape are both more efficient, longer-lasting options), but unless you really know what you’re doing with your ductwork, you may want to leave maintenance to the professionals.
Best practices for duct sealing.
Use mastic sealant or foil-backed duct tape to seal all joints, seams and connections. Check out our duct sealing upgrade page for more information. Insulate ducts that run through unconditioned spaces such as your attic, crawl spaces and garage to reduce thermal loss.
When to call a duct sealing pro.
If you’re not confident in your DIY skills, if ducts run through hard-to-access areas, or need extensive sealing, a professional familiar with ACCA standards or local building codes is the way to go. If you suspect disconnections or serious leakage, you should look for a trusted expert. Plus, they’ll also have the equipment to run pre- and post-sealing leakage testing to help ensure the best results.
Chapter 2: Air sealing.
Why air sealing matters.
Air sealing is the process of closing small cracks, gaps and holes in your home’s building envelope — the barrier between indoors and outdoors. It’s especially important to have older homes inspected, but new construction shouldn’t get a free pass! As new homes settle, cracks and gaps often appear. Sealing up these gaps before winter (or summer) can dramatically reduce drafts, energy loss and discomfort.

Where to find air leaks in homes:
- Attic and crawlspace hatches.
- Window and door frames, sashes, jambs, sills.
- Plumbing and electrical penetrations (pipes, wires).
- Recessed lights, vents, fans and vent ducts.
- Around baseboards and where walls meet ceilings.
- Refrigerator, dishwasher or exhaust fan penetrations.
- Outlets, switch boxes and vent registers.
How to detect air leaks.
DIY-friendly and renter-friendly method.
For a low-cost preliminary check, you can take the DIY route. Here’s how:
- On a windy day, close all windows and exterior doors. Turn on exhaust fans (bathroom, kitchen hood).
- Light an incense stick (or use a damp hand) and slowly move around door frames, window edges, baseboards — feel or watch for air movement.
- Common leaks are at doors, windows, attic hatches, rim joists, plumbing or wiring penetrations and vents.
Want to get your kids in on the fun? Check out “Calling all junior detectives! Use your sleuthing skills to spot sneaky leaks.”
Why air sealing matters.
Lower energy bills: According to ENERGY STAR, air sealing and insulation can reduce heating and cooling costs by an average of 15%, and in some cases even more.
Improved comfort: Cut down on drafts, promote more stable indoor temperatures, reduce cold spots and take the burden off your HVAC systems. You can learn more about R-value (the higher the R-value, the greater the material’s insulating power) and find your climate zone on the Department of Energy’s website.
Better indoor air quality: Sealing leaks reduces infiltration of dust, pollen, mold spores, moisture and pests — which is especially relevant if vents, crawlspaces or attics are connected to living spaces.
Moisture and maintenance: Sealing leaks and home weatherization help prevent condensation, mold, mildew and structural damage from moisture infiltration.
Best practices for air sealing.
You don’t have to do everything at once! Remember, every improvement helps. To get started, we recommend focusing on key areas that can make the biggest difference.
Seal doors and windows.
- Use weatherstripping around doors and movable window sashes.
- Apply caulk to seal cracks around stationary window frames and exterior trim.
- Install door sweeps to block drafts at the bottom of exterior doors.
- Apply window film to especially drafty windows.

Address the attic and crawlspace.
- Look for gaps around plumbing vents, electrical wiring and chimneys in your attic.
- Use expanding foam or caulk to seal small holes and install covers or gaskets where needed.
- In crawlspaces, sealing gaps between the foundation and framing can stop cold air from entering your floors.
Chapter 3: Insulation.
Uneven temperatures, drafty rooms and high (or unpredictable) energy bills could mean your home is under-insulated or letting your conditioned air out and unconditioned air in!
Why insulation matters.
Insulation slows heat flow (via conduction, convection or radiation), helping keep warm air in during the winter or out during the summer months. Proper insulation reduces the load on your HVAC system and lowers energy use.
Types of Insulation.
The type of insulation you use may depend on where it’s being installed and your home’s specific needs. Some common insulation types include:
Blown-in (loose-fill) insulation
Ideal for attics and wall cavities, this type of insulation is made of fiberglass or cellulose and is blown into place using special equipment.
Batt insulation
These pre-cut panels of fiberglass or mineral wool are one of the most affordable and widely used forms of insulation. They’re ideal for open areas like between wall studs, floor joists and attic rafters.
Spray foam insulation
Expands to fill gaps and create a tight air seal. Available in open-cell and closed-cell varieties, spray foam is especially effective for sealing around pipes, wiring and small crevices.
Foam board insulation
Rigid panels made of polystyrene or polyurethane are typically used on foundation walls, basement interiors and exterior walls under siding. Foam boards offer high insulating value with a relatively thin profile.

R-value and where to insulate.
Insulation is measured in R-values, which indicate its resistance to heat flow — the higher the R-value, the better the insulation power. Visit our insulation and air sealing upgrade page for more information.
In the South, many homes are under-insulated — especially older houses. If the floor joists are exposed in your attic, for example, that’s a strong indication that you need additional insulation. Fortunately, rebates are available.
Insulation works best when the building envelope is tight. Installing insulation first, then sealing leaks, can leave gaps behind insulation or make leaks harder to find. Professionals and building-science guidance recommend sealing first, then insulating.
Here are key areas to consider for insulation:
- Attic insulation: Consider blown-in cellulose or fiberglass batt insulation to reach the recommended R-values for your region.
- Crawlspace insulation: Insulating the floor above the crawlspace can help maintain warmth on the first floor.
- Wall insulation: Harder to retrofit, but sometimes possible with dense-pack cellulose or foam injection.
You don’t always need a full insulation overhaul. Even topping off attic insulation or insulating around rim joists can make a big difference. Not sure where to begin? A member of our Quality Contractor Network can help.
For maximum efficiency, we recommend combining air sealing with insulation upgrades.

Chapter 4: HVAC maintenance
HVAC maintenance is essential for comfort, safety and efficiency — and helps prevent unexpected breakdowns when you need your system the most. We recommend scheduling a tune-up twice a year — once in fall (before heating season) and once in spring (before cooling season). Certainly, if you notice strange sounds coming from your unit and higher-than-normal bills, call in the pros regardless of whether your inspection is due or not.
If you have your home air sealed or insulated, it may be a good idea to add a tune-up to the list. Why? Because home envelope sealing may change airflow and pressure dynamics, which can affect how your system operates.
Why seasonal HVAC maintenance matters.
- Avoid costly emergency repairs — A well-tuned system is less likely to break down during extreme cold or heat.
- Improve energy efficiency: Clean systems run more efficiently and maintenance can catch issues (dirty coils, malfunctioning parts, airflow restrictions) that cause efficiency losses.
- Enhance indoor air quality: Regularly changing or cleaning filters helps trap dust, pollen and other particles rather than circulating them throughout the home.
- Extend equipment lifespan: Routine maintenance reduces wear and tear and lets you catch small problems before they become major.
- Ensure safety: Technicians can inspect for gas leaks, cracked heat exchangers, faulty wiring or improper ventilation — especially important if you have combustion appliances.
- Peace of mind: Proper airflow, clean components, calibrated thermostats — all lead to a more consistent, comfortable indoor environment.
- Take advantage of rebates: Get $50 off HVAC maintenance with a rebate from TVA EnergyRight and your local power company.
- Save money: Using less energy, helping your HVAC system last longer and taking advantage of rebates all add up to saving money.
What a typical HVAC maintenance visit should include.
Chat with your HVAC technician to make sure their inspection includes the following:
- Filter inspection/change.
- Coil cleaning (evaporator and condenser).
- Checking refrigerant levels (for cooling systems / heat pumps).
- Lubricating moving parts.
- Inspecting electrical connections and wiring.
- Testing safety controls, airflow and thermostat calibration.
- Checking defrost cycles and reversing valve in heat pumps.
Chapter 5: How to hire a qualified contractor.
Upgrades like duct sealing, air sealing, insulation and HVAC maintenance/installation often benefit from a trained, licensed and experienced contractor — especially when you want quality, safety and long-term performance.
What to look for in a trusted contractor.
We hope you’ll take advantage of our Quality Contractor Network (QCN) to find a TVA-vetted contractor near you. As you consider your options, keep the following recommendations in mind:
Licensing & insurance: Ensures compliance with state/local codes and protects you in case of accidents. (Members of the QCN are licensed and insured.)
Proven experience: Specifically, look for experience with the system and climate you have — whether that’s traditional furnaces/AC, heat pumps, ductless mini-splits or combinations.
Knowledge: They should have demonstrable knowledge of energy-efficiency standards and building science (air sealing, insulation, load calculations, duct sealing, ventilation).
Customer references and positive reviews: Look for consistency, on-time accolades and comments about professionalism, transparency and good communication.
Clear written estimates: Your quote should include labor, materials and scope of work; no vague or open-ended pricing.
Training: They should be willing to show their certifications or talk about their training.
Transparent communication and customer care: You should feel like they’re listening to you and explaining their work in clear terms.
Glossary
ACCA: Air Conditioning Contractors of America; publishes national HVAC installation and quality standards.
Air Sealing: The process of closing leaks, cracks and gaps in a home’s building envelope to prevent unintended airflow.
BTU: British Thermal Unit; a measure of heating or cooling output.
Combustion Safety Test: Inspection of gas-fired appliances to ensure proper ventilation and safe exhaust.
Duct Sealing: Repairing and sealing HVAC ductwork to prevent air leaks and improve airflow efficiency.
ENERGY STAR®: A U.S. government-backed symbol for energy efficiency, managed by the EPA and DOE.
Heat Pump: A heating/cooling system that moves heat in or out, rather than generating it via combustion.
HVAC: Heating, Ventilation and Air Conditioning
Load Calculation (Manual J): A standardized method (published by ACCA) to determine the correct size HVAC system for a home.
Mastic: A durable sealant used to seal ducts; more effective and long-lasting than standard “duct tape.”
QCN: Quality Contractor Network (e.g., regional networks like TVA EnergyRight’s that pre-vet contractors for quality/insurance/experience).
R-value: A measure of an insulation material’s resistance to heat flow; the higher the R-value, the better its thermal resistance.
SEER2: Seasonal Energy Efficiency Ratio; a metric for air conditioner / heat pump cooling efficiency (new standard).
Supply / Return Ducts: The ducts that deliver conditioned air to living spaces (supply) and return air back to the HVAC system (return).
Taking a break from winter? Set your home to energy-saving mode.

Save on energy costs while you’re away from home.
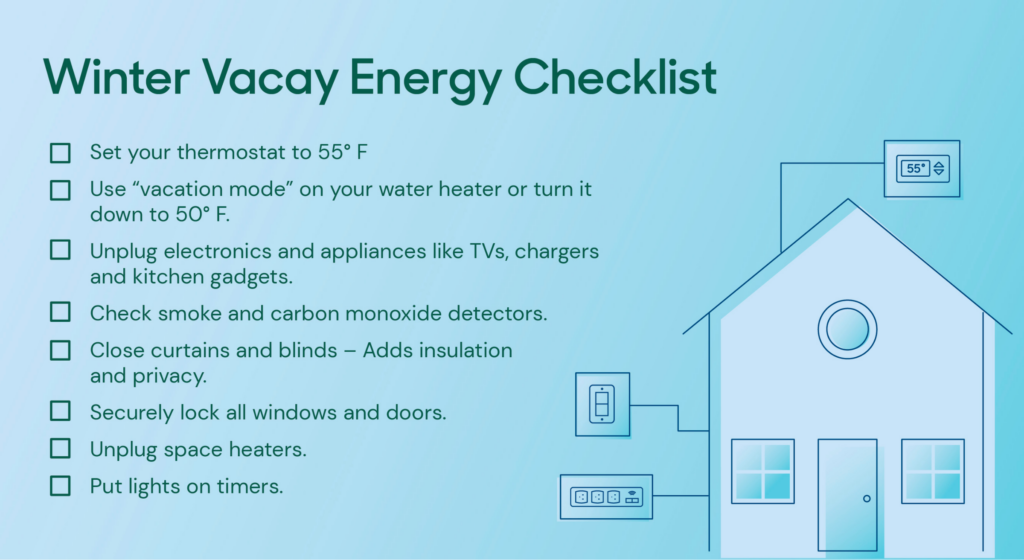
If you’re taking a break from winter this winter, consider setting your home to eco-mode before you hit the beaches (or the slopes). Vacation mode isn’t just a mindset, it’s also a great way to reduce energy waste and control your energy costs. Here are a few ideas to help you safely reduce energy use while you’re off enjoying life.
Happy travels!
Lower your thermostat.
It’s never a good idea to turn your heat off entirely, but if you’re going to be away for extended periods of time, you can safely adjust your thermostat down to 55-60 degrees. It’s low enough to reduce energy consumption but high enough to protect your pipes from freezing.
If you have a programmable or smart thermostat, you can schedule changes before you leave or adjust them remotely. You can even program your homecoming time so that your home is
nicely warmed up and ready for your return.
If you don’t have a smart thermostat yet, and you’re thinking about purchasing one, check to see if your local power company is participating in our Smart Thermostat Rewards program.

Protect your pipes!
You may want to consider opening bathroom and kitchen cabinets that contain plumbing — especially if they’re located on an exterior wall. This will help prevent pipes from freezing and bursting.
If you’re going to be away for a month or more, consider shutting the water supply to your home off entirely. Once you’ve turned off the supply valve, turn on a faucet inside your home to relieve pressure in the lines — this also prevents residual water from freezing. This option also eliminates the possibility of damage caused by hidden or unexpected leaks! When you return, turn the supply valve back on and allow water to flow through your taps to flush the pipes.
Adjust your water heater settings.
Speaking of water, you can also save energy by adjusting your water heater settings. Unless your home has an on-demand system, your water heater operates around the clock — even when no one’s around to use the hot water it produces. Before you leave, switch your unit to “vacation” or “away” mode (if your system has that setting) or lower the thermostat to 50 degrees.
When you return, temporarily set your system to 140 degrees for a couple of hours and then run the hot and cold taps in your home to flush out stagnant water. This is an effective way to wash away any bacterial buildup or sediment that may have accumulated.
Time your lights.
If you like to leave a few lights on for that lived-in feel, you can purchase a programmable timer with a “random” mode to convincingly vary programmed lights. While you’re at it, make sure your bulbs are energy efficient LEDs.
Unplug unused electronics.
Most microwaves, coffee makers, TVs, printers, chargers and gaming systems draw electricity even when you’re not using them — this is known as ”vampire” or “phantom” energy use. If you’re going out of town for more than a week, unplug energy-sucking appliances and gadgets.
See to your fridge and freezer.
If you’re only going to be away for a week or two, share refrigerated perishables with friends and neighbors, but leave your refrigerator running. If you’re leaving for a month or more, consider cleaning out your fridge and setting it to a warmer temperature setting or unplugging it.
Whether you’re heading out for a long weekend or for weeks at a time, turn your icemaker off and shut off the water supply to your refrigerator — this can help prevent costly ice machine repairs and/or leaky messes.
Finally, if your fridge or freezer is less than half full when you’re ready to hit the road, stock them with a few gallon jugs of cold water to help maintain proper temperature. Cold, non-perishable items — such as water jugs or bags of ice — can help maintain consistent internal temperatures when the compressor isn’t running, therefore reducing the amount of time the compressor has to operate in your absence.
Happy winter to you and yours! Enjoy your travels and travel safely.
8 energy-saving gadgets and gifts for the holidays

Give the gift of savings and comfort.
We know sweater weather is here, but let’s leave the ugly knits to your cousin Carol and light up the season with smart — and unexpected — energy-saving home technology gifts. From stocking stuffers to splashy splurges, these eight gift ideas are perfect for the gadget-lovers on your gift list.
Plug-in smart outlets: The perfect gift for multitaskers.
Best for: The multitasker and the forgetful.
Cost: About $25 for a 4-pack.
Smart plugs can help your loved ones rein in energy costs in unexpected ways. Plug any on/off device like a desk lamp, fan or entertainment system into a plug-in smart switch and control it from anywhere using an app — making it great for those “Oh no! I forgot to turn off the …” moments.
For added convenience, most models are compatible with other devices, such as smart thermostats, motion detectors or smart home platforms like Amazon Alexa, Apple HomeKit or Google.

Smart thermostats: For the “set-it-and-forget-it” on your list.
Best for: The budget-wise and comfort-conscious.
Cost: About $50-$250.
Smart thermostats make it easy to control your home’s energy use, reduce energy costs and improve your comfort. ENERGY STAR® estimates that families can save between $50 and $100 each year by using a smart thermostat.
If your recipient’s local power company is participating in TVA EnergyRight’s Smart Thermostat Rewards, additional rebates may be available.

Smart dimmer switches and motion detectors: A stocking-stuffer for the trend-setters.
Best for: The vibe-setter and the traveler.
Cost: About $15 per switch.
Smart dimmer switches enable your friends and family to dim groups of lights throughout their home simultaneously, or they can create an automated schedule to turn on or off when they’re not home.
Smart LED bulbs: For the mood-setters in your life.
Best for: The interior designer and the emotional chameleon (AKA: teenagers).
Cost: About $30 for a 3-pack.
Level up your friends’ LED game with smart LED bulbs. They’ll be able to program their lights to turn on when they detect motion, align brightness to circadian rhythms, select color and color temperature, and schedule or automate individual bulbs to fit their schedules — and control them all via an app or voice command.

Smart ceiling fan switch: For the dad who has everything.
Best for: The height-averse, comfort-minded and hard-to-shop-for loved ones.
Cost: About $90 per switch.
We know your ceiling fans are already running clockwise for the winter, circulating warm air from the ceiling throughout your home, but are your friends fans of the seasonal ceiling fan direction? Installing a wall switch that controls hard-to-reach ceiling fans makes seasonal adjustments a breeze. Some switches even connect to the internet, a home assistant or a smart thermostat so that the fan turns on when a room gets too hot or cold — or turns off when the room is empty.
WaterSense-certified sprinkler controller: For the gardeners who grow.
Best for: The green thumb (or the brown thumb).
Cost: About $200 for an 8-zone system.
Traditional sprinkler systems can be wasteful and inefficient. The EPA reports that WaterSense-certified smart controllers can save the average home 7,600 gallons of water each year! A Wi-Fi smart sprinkler acts like a thermostat for a sprinkler system by telling it when to turn on and off. They take the guesswork out of watering and can adjust water schedules based on hyper-local weather and soil conditions.
Water leak sensor: For the compulsive worrier.
Best for: The worrier and the controller.
Cost: About $50 for a 2-pack.
The EPA estimates that everyday household leaks in the U.S. account for about 1 trillion gallons of wasted water each year! To catch small leaks before they become costly catastrophes, give the worriers in your family a pack of smart leak sensors. They can place the sensors around washing machines, dishwashers, water heaters, toilets and any other leak-prone areas and receive a smartphone alert if a leak is detected.
Whole-home energy monitoring: For the geeks you know and love.
Best for: The data-driven homeowner and the engineer.
Cost: About $100-$300.
Whole-home energy monitors measure the amount of electricity your home uses — right down to individual circuits and devices. Although the monitor won’t help your friends reduce energy use, it will help them identify what’s consuming the most electricity so they can make informed energy decisions. Some apps even allow users to optimize the schedules of high-draw devices such as dryers, air conditioners and EV chargers so that they run during off-peak hours.

10 tips for hiring a heating and cooling contractor you can trust.

When your heating and cooling system needs a tune-up, repair or replacement, finding a great HVAC contractor can make all the difference. A trusted contractor doesn’t just fix your heating, cooling and duct systems; they help make sure your home stays comfortable, your energy bills are manageable and your HVAC and/or duct work investment lasts for years.
With so many contractors out there, how do you know who you can trust? We got you! This article is for forward-thinking homeowners like you! If you have preventive heating and cooling tune-ups and maintenance on your mind, or you’ve been thinking about upgrading your HVAC, these tips should help you find and hire a contractor you can trust.
Helping you find the best local heating and cooling repair company.
We’ll dive into everything you need to know about selecting the right contractor for your heating and cooling tune-up or replacement, but first, here’s a quick word about TVA EnergyRight’s Quality Contractor Network (QCN): We hope that you’ll use the QCN as your go-to resource for finding a TVA-vetted, licensed and insured contractor for all kinds of home improvement projects. Use our online “find a contractor” tool to identify professionals who can help you with projects ranging from heating and cooling to air sealing, insulation, plumbing and more.
In fact, helping people in our region find professionals they can trust is one of the reasons why we started the QCN! To get started, visit our website and use our “find a contractor tool.” All you’ll need to do is enter your zip code and local power company to find participating contractors in your area.

Regardless of whether or not you use our Quality Contractor Network, it’s important to do your own research and find a professional you feel comfortable with. Whether you’re upgrading your system, improving efficiency or just need a seasonal tune-up, here are 10 things to look for in a trusted HVAC contractor.
#1 — Make sure they’re licensed and insured.
Before signing a service agreement or contract, make sure your HVAC professional is properly licensed and insured. Licensing ensures they’ve met state and local requirements for training and expertise, and their insurance can protect you and your property in case of accidents or property damage during the job.
The QCN only includes licensed and insured professionals, so you can hire with confidence knowing these boxes are already checked.
#2 — Take a close look at their experience and expertise.
A trusted HVAC contractor should have a proven track record of success and experience working with your type of system — whether it’s a traditional heat pump, high efficiency air conditioning unit, geothermal heat pump or ductless mini split heat pump.
Experienced contractors can identify potential problems more quickly, offer more accurate estimates and complete jobs efficiently.
The best contractors stay up-to-date on systems recommended by ENERGY STAR®, SEER2 ratings, home energy efficiency upgrades, rebates guidelines and the latest efficiency standards. Many are accredited by the Air Conditioning Contractors of America and participate in their Quality Assured Residential Services & Installation (RSI) program.
Energy efficient HVAC systems can save you money over time, but only if they’re installed and set up properly. If you choose to work with a QCN member, they’ll be well-versed in the latest energy-saving technologies and can help you apply for rebates from TVA EnergyRight and your local power company.
#3 — Look for positive reviews and ask for references.
Good reputations are earned, not given. Before you hire anyone, check online reviews or ask the contractors you’re considering for customer references. Look for consistent feedback about punctuality, professionalism, communication and the quality of their work.
Contractors in TVA EnergyRight’s Quality Contractor Network are customer-reviewed and vetted for performance. When you choose a QCN member, you’re choosing a contractor trusted by your neighbors.
#4 — Be sure to get a detailed estimate.
A reliable HVAC contractor won’t surprise you with hidden fees or vague pricing. They’ll provide a clear, written estimate that outlines all expected costs. Double check they’ve included labor and materials as well as the equipment cost.
#5 — Compare bids to get the best offer.
If a contractor hesitates to give you a detailed estimate in writing, that’s a red flag! You’ll want to confirm you’ve agreed on the scope of work before signing off on the work. This also makes it easier to compare “apples to apples” bids from multiple contractors to make sure you’re getting the best deal possible.
#6 — Ask them about sizing and load calculations.
A system that’s too large or too small for your home will waste energy, and may lead to uneven temperatures, frequent repairs and a shorter lifespan.
A trusted HVAC contractor will conduct a Manual J load calculation to measure your home’s square footage, insulation levels and airflow needs. This helps them accurately determine the right system size for your home, and that your system operates efficiently and comfortably year-round.
#7 — Clear communication and honest customer care.
Good communication is key to a smooth project. Look for contractors who are proud of the service they offer. You can often tell, because they’ll take the time to answer your questions thoughtfully, explain their recommendations and walk you through every step of the process.
Members of our QCN are encouraged to put the customer first: From the initial call to the final inspection, they’re committed to clear communication and reliable follow-up service.

#8 — Ask about training, certification and education.
HVAC technology is constantly evolving. The most trusted contractors invest in continuing education and certifications to stay current with new equipment, installation methods and building codes.
Don’t shy away from asking your contractor about their team’s ongoing training and certification efforts.
#9 — Look for affordable routine maintenance and service offers.
A trustworthy contractor isn’t just interested in a one-time interaction — they want to build a lasting relationship with you … and your friends and neighbors!
QCN members can also help you establish a regular maintenance schedule that ensures your system performs at peak efficiency year-round, keeping your energy bills on track and your home comfy.
#10 — Find a contractor that’s a part of your community.
Finally, look for contractors who are active members of your community. Local professionals understand the unique heating and cooling needs of our region and take pride in helping neighbors stay comfortable all year long.
From waste to watts: How General Mills turns yogurt into power.

It might sound like science fiction, but in Murfreesboro, Tennessee, yogurt waste is helping power the grid. At General Mills’ massive facility—home to iconic brands like Pillsbury and Yoplait—a clever use of dairy byproducts is reducing emissions, improving resilience and offering a model that other manufacturers could follow.
Here’s how it works — and why it matters.
What’s in yogurt waste? And why it’s powerful.
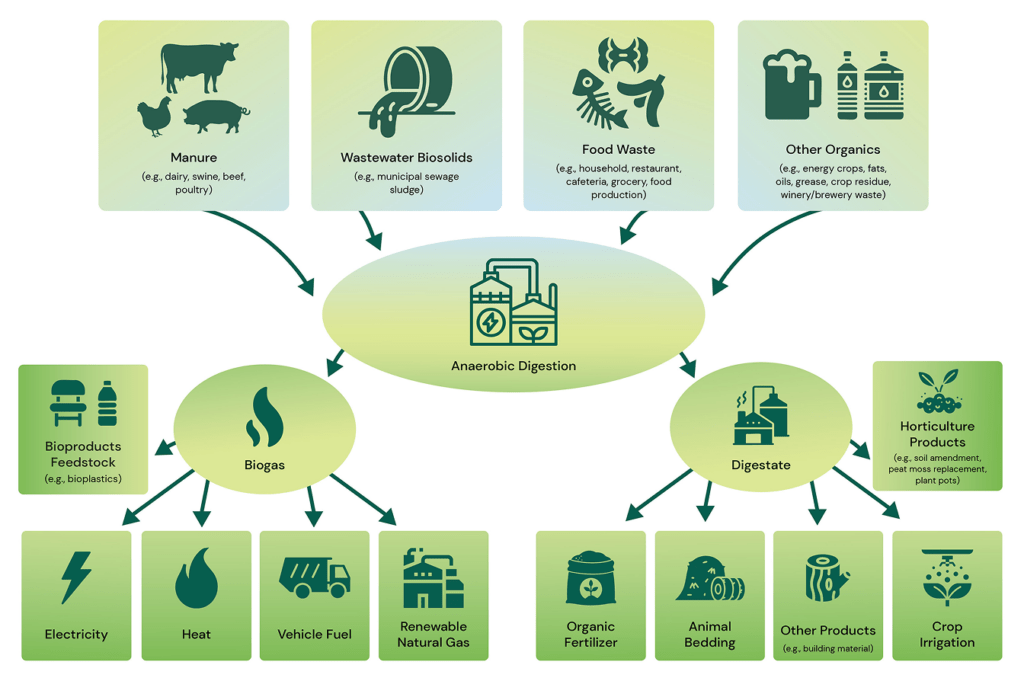
Greek yogurt production generates a significant amount of byproduct known as acid whey — a nutrient-rich liquid that’s expensive to dispose of and challenging to manage. But it also happens to be full of organic material that breaks down well in a process called anaerobic digestion.
Anaerobic digesters are machines that break down food and plant waste using tiny microbes (like bacteria) that don’t need oxygen. As the microbes consume the waste, they produce a methane-rich gas, also known as biogas, which can be used to generate electricity.
At General Mills’ Murfreesboro plant, that biogas is used to power a 1.6-megawatt generator, supplying energy right back to the facility and offsetting fossil fuel use. Even better? The leftover material (digestate) can sometimes be repurposed as fertilizer.
Sources: epa.gov; generalmills.com
Why is the Middle Tennessee plant location unique?
The General Mills site is unique not just for its size — it’s one of the largest Yoplait producers in the country — but for its on-site wastewater treatment plant. Plus, with a demand load exceeding 15 megawatts — one of only four General Mills plants globally to reach that threshold — the facility’s energy performance has a significant impact on both operational efficiency and sustainability goals. When the facility expanded to accommodate Greek yogurt production, it invested in an anaerobic digester to handle the acid whey and other organic waste.
With support from federal clean energy tax credits and strong technical assistance from Middle Tennessee Electric (MTE), the plant was able to safely integrate the generator into the grid. That partnership was essential to making the system viable — not just technically, but economically.
Daren Kaiser, Global Energy Strategy Leader for General Mills, says, “We got 40% of that cost covered by a federal rebate, but the real win was Middle Tennessee Electric’s willingness to partner with us. MTE was with us every step of the way. They probably worked harder than our contractors to make sure it came together. That kind of partnership makes innovation possible.”
What’s the impact?
The anaerobic digester is a low-emission, high-reward system that helps General Mills:
- Reduce a facility’s Scope 1 emissions (by burning natural gas).
- Save on waste disposal costs.
- Generate renewable electricity.
- Increase energy resilience for a plant that operates 24/7 and can’t afford outages.
- Keep valuable nutrients out of landfills or waterways.
The anaerobic digester at General Mills provides a powerful win-win for business and the environment. Beyond reducing Scope 1 emissions and cutting waste disposal costs, it generates clean, reliable power — perfect for a plant that can’t tolerate downtime. Plus, the digestate, a semi-solid material left over from the anaerobic digestion process, can be used as fertilizer, keeping nutrients in the loop rather than allowing them to leach into landfills or waterways.
Source: cen.acs.org
Can other industries do this, too?
Yes! Anaerobic digestion is also being used by:
- Food and beverage manufacturers (especially dairy, meat and produce)
- Breweries (spent grains and yeast waste)
- Agriculture (manure and crop waste)
- Municipalities (food scraps, sewage sludge, biosolids)
The keys to success? A consistent waste stream with sufficient volume to justify the system, and strong local utility partnerships to help manage grid integration and incentives.
For companies under pressure to meet sustainability goals without sacrificing uptime or margins, anaerobic digestion offers a compelling win-win. What starts as a byproduct of creamy Yoplait ends up fueling the plant that makes it. In a time of increasing energy demands, turning waste into energy might be one of the smartest, most scalable strategies available.
Sources: epa.gov
Ready to take the next step?
Connect with your local power company or with one of our TVA Energy Experts to explore energy-efficiency options tailored for your business or facility.
How to talk to your landlord about energy upgrades for leased spaces.

Renting your business space doesn’t mean you’re powerless when it comes to saving energy. In fact, tenants often have more influence than they realize — especially when the conversation focuses on shared benefits, such as cost savings, comfort and long-term value. Whether you’re looking to lower monthly bills, improve working conditions or enhance reliability, energy upgrades can be a win-win for both you and your landlord. Here’s how to approach the conversation with confidence.
Why energy upgrades for leased spaces matter for tenants.
If you’re dealing with rising energy bills, inconsistent temperatures or outdated lighting, you’re not alone. Many tenants in leased commercial spaces face these issues—and feel stuck because they don’t own the building. But energy upgrades can dramatically improve your day-to-day experience. Efficient lighting, smart thermostats, HVAC tune-ups and insulation improvements can all make your space more comfortable and productive, while lowering operating costs at the same time.
And the benefits go beyond the utility bill. Strategic upgrades can reduce maintenance issues, improve system reliability and even enhance employee or customer satisfaction. The key is making sure your landlord sees the value, too. Here are some steps you can take to start the conversation.
1. Understand potential roadblocks.
Tenant-landlord dynamics may impact decisions about building improvements. You may not have full authority to make changes to systems like lighting or HVAC, and your landlord may not feel motivated to invest in upgrades that primarily lower your bills — a common issue known as a split-incentive problem. You reap the savings, and they pay the upfront cost.
Short-term leases can be another barrier. Landlords might worry they won’t see a return on investment if tenants relocate before the payback period ends. But these objections aren’t deal-breakers. They’re just part of the conversation. Being prepared can help you address them head-on.
2. Identify your opportunities.
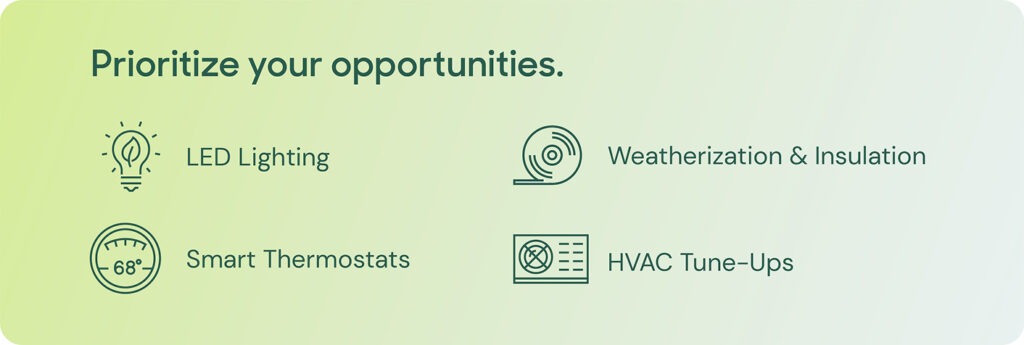
Before starting the conversation, take the time to identify specific upgrades or improvements that could make a significant impact in your space. Start with areas that offer high energy savings and fast paybacks, like:
- LED lighting uses up to 75% less energy compared to incandescent lighting.
- Smart thermostats to automate temperature control based on occupancy.
- HVAC tune-ups to improve indoor air quality, efficiency and extend system life.
- Weatherization and insulation to help stabilize indoor temperatures.
Even better: gather quick data on potential cost savings using tools like TVA EnergyRight’s incentive calculator. You can also note any performance issues like hot or cold spots, flickering lights, or equipment noise that support your case for improvements.
Sources: Energy.gov, EnergyRight.com; nrel.gov
3. Turn talk into savings.
The best time to talk about energy upgrades is before there’s a problem—not after the HVAC system fails on a 90-degree day. Bring up the topic during a lease renewal, a property walkthrough or even a casual check-in. Come prepared with:
- A short list of potential upgrades.
- Examples from similar properties or business case studies.
- Information on available TVA EnergyRight® incentives.
Sharing success stories or information on incentives from TVA EnergyRight can make your pitch more concrete and less abstract.

Sources: ApartmentTherapy.com; EnergyRight.com; Score.org
4. Frame the conversation as a win-win.
Once you’ve identified your priorities, focus on how these upgrades can benefit both you and your landlord. The goal is to reframe the request as a shared investment in the property’s long-term value.
For you as a tenant, the value is clear: lower energy bills, increased comfort and more reliable operations. For your landlord, the upgrades can translate into higher building value, lower vacancy rates and a more marketable property. In today’s competitive rental market, energy-efficient buildings are becoming increasingly attractive to prospective tenants—especially those seeking modern, sustainable spaces.

Source: EnergyStar.gov
5. Offer to partner in the process.
You don’t have to make the request and hope for the best — you can offer to be part of the solution. If you’re proposing larger upgrades, suggest starting small with a pilot project like retrofitting just one area with LED lighting. You can also propose a cost-sharing model or help by researching contractors, gathering quotes or completing incentive paperwork. This kind of proactive partnership can go a long way in showing your landlord that you’re serious and solution-oriented.
Another way to strengthen the landlord-tenant partnership around upgrades is through an energy-aligned lease. Instead of leaving energy use and costs to chance, these agreements build energy efficiency language directly into the lease itself. For example, clauses can allow landlords to recover a portion of capital expenses for upgrades through operating costs while ensuring tenants share in the savings.
According to the Institute for Market Transformation, energy-aligned leases can reduce utility bills by up to $0.51 per square foot and cut office building energy use by as much as 22%. In practice, this turns the split-incentive problem into a shared-investment model — landlords benefit from higher property value and improved net operating income. At the same time, tenants gain lower bills, better comfort, and more reliable systems.

Take the next step.
If your landlord is open to the idea, recommend setting up a walkthrough with your local power company or another energy expert. TVA EnergyRight can provide tools, resources and support to help identify energy upgrades for leased spaces and the available incentives.
Remember, you don’t have to navigate this alone. Even a single conversation can lead to improvements that benefit everyone who uses the space.
A win-win worth talking about.
Energy upgrades don’t just save money — they create better places to do business. And while you may not own the building, you can help shape its future. So, go ahead. Start the conversation with your landlord, focus on the mutual benefits, and come prepared with information and ideas.
Need help? Connect with a TVA Energy Expert to explore your options and get expert support.
The Truth About the ROI of Energy Efficiency for Small Business Owners

Running a small business means watching every dollar. Rent, payroll, inventory and marketing — it all adds up fast. But there’s one line item that’s often overlooked: energy costs. Utility bills can eat into margins, and unlike other expenses, they don’t go away on their own. The good news? Energy efficiency upgrades offer one of the most reliable returns on investment (ROI) available to small business owners.
Why the ROI of energy efficiency matters for small businesses.
Energy is often a top-three expense for small businesses, behind only labor and rent. That means efficiency isn’t just a sustainable choice — it’s a smart financial strategy. Beyond savings, efficiency upgrades enhance comfort, improve the customer experience and even boost employee productivity.
The case for efficiency.
The ROI of energy efficiency is measurable. According to ENERGY STAR, small businesses can cut utility costs by up to 30% with upgrades that quickly pay for themselves.
- Lower monthly bills: Upgrading equipment to more efficient models reduces energy bills. Just swapping outdated lighting for LEDs alone can reduce electricity use by up to 75%.
- Incentives and other energy solutions: Make your equipment upgrades more affordable with incentives from your local power company and TVA EnergyRight®, which can help reduce project costs and the payback period.
- Long-term value: Once installed, upgrades like HVAC and Refrigeration continue saving money year after year.

Sources: energy.gov, energystar.gov, EnergyRight.com
Small investment = big benefits.
The value of efficiency goes beyond numbers on a utility bill. A well-lit, inviting space makes a difference for everyone who walks through your doors.
Stronger customer experience: Bright, well-lit spaces encourage shoppers to stay longer — and spend more.
Better working conditions: Improved HVAC and lighting create a comfortable environment for businesses and other organizations, like schools.
Improved employee satisfaction: Studies show comfortable workplaces and better lighting boost productivity and reduce turnover.

Sources: epa.gov; hrfuture.net; pecnw.com
Real-world ROI: Ironhorn Enterprises
Energy efficiency isn’t just about trimming bills—it can help seal business deals, too. Take Ironhorn Enterprises, a commercial real estate firm specializing in industrial and warehouse properties.
When a new tenant was interested in leasing an Oak Ridge, Tennessee, warehouse, the outdated 1,000-watt metal halide lighting threatened to derail the deal. Powering the space would have been too costly for the tenant to justify.
The solution: Ironhorn partnered with the Oak Ridge Electric Department and TVA EnergyRight® to upgrade the facility with 110 energy-efficient 300-watt LED high-bay fixtures.
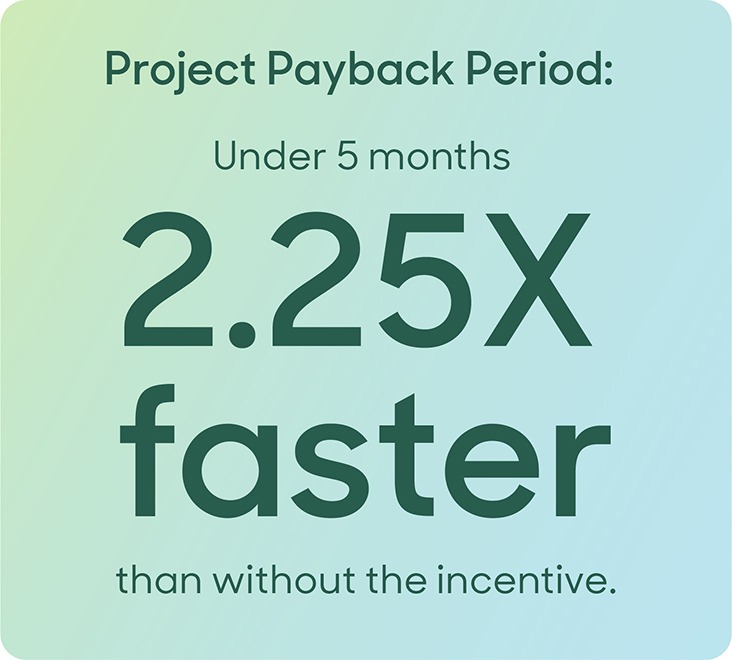
The results:
- 317,638 kWh annual energy savings
- $30,914 in annual energy cost savings
- $28,205 incentive from TVA EnergyRight
- Simple payback: <5 months
Beyond the impressive numbers, the upgrade helped Ironhorn secure the tenant, modernize its property and enhance long-term value.
Beyond cost savings: building resilience and brand value.
Today’s customers expect businesses to operate sustainably. Using the ROI of energy efficiency metric is a way to show that you care about your community while strengthening your bottom line. It also makes your business more resilient—less vulnerable to rising energy prices or unexpected system breakdowns. Positioning your business as efficient and sustainable can become a competitive edge that attracts both customers and talent.
How to get started.
Getting started doesn’t have to be complicated.
- Save up to $375 in annual energy costs with a free Smart Energy Starter Kit from TVA Energy Right and your local power company.
- Explore TVA’s incentives and other programs to get upgrades with short payback periods.
- Work with a TVA Energy Expert to identify the best opportunities for your space.
For small business owners, energy efficiency is more than a buzzword — it’s a proven investment. Lower bills, improved comfort, happier employees, and a stronger brand all add up to measurable ROI and long-term success.
Take the first step today. Explore TVA incentives, request your Smart Energy Starter Kit and start saving.

Frequently Asked Questions
Q: What is the ROI of energy efficiency for small businesses?
The ROI varies by project, but many small businesses see payback in just a few years — or even months. For example, lighting retrofits with LED fixtures can cut electricity costs by up to 75% and often pay for themselves in under two years.
Q: What are the best energy efficiency upgrades for fast payback?
High-impact, low-cost projects, like LED lighting updates, HVAC upgrades and smart thermostats, often deliver the quickest payback. These upgrades lower monthly utility bills and improve comfort for employees and customers.
Q: Can energy efficiency improve employee productivity and customer experience?
Yes. Better lighting, consistent indoor temperatures and improved air quality create a more welcoming space. Employees tend to be more comfortable and productive, while customers enjoy spending more time in your business.
Q: How can small businesses in the region get started with energy efficiency?
TVA EnergyRight offers a complimentary Smart Energy Starter Kit to help small and mid-size businesses take the first steps to cut energy costs. If you are ready to replace equipment like LED lighting, HVAC or Refrigeration, our incentives make the investment more affordable, and a TVA Energy Expert can guide you through options that deliver the most impact for your business.