Efficiency Hunters: Weatherproofing

Stay warm in the winter and cool in the summer.
In this video and article, you’ll learn:
- What weatherproofing is and why it matters
- How to weatherproof your home
- How to find a trustworthy contractor for bigger home energy projects
If the inside of your home feels like a sauna in the summer and a freezer in the winter, this message is for you! Heating and cooling your home accounts for the largest part of your total household electricity use — around 30%. That means it’s also the area where you can make some really impactful energy efficiency improvements to save energy, lower your utility bills and increase comfort in your home, no matter the season. We’ve rounded up four weatherproofing tips to help get you started. Read on for more, and check out the tips in our latest episode of Efficiency Hunters, where TVA-certified Home Energy Advisors show homeowners like you how to save energy and money at home.
What is weatherproofing?
Weatherproofing means protecting your home from the elements so you can keep the outside out and the heating and cooling you pay for in. That can include everything from closing the curtains during the hottest part of the day to installing new doors and windows. The idea is to make changes that keep you more comfortable inside your home without blowing up your energy bill!
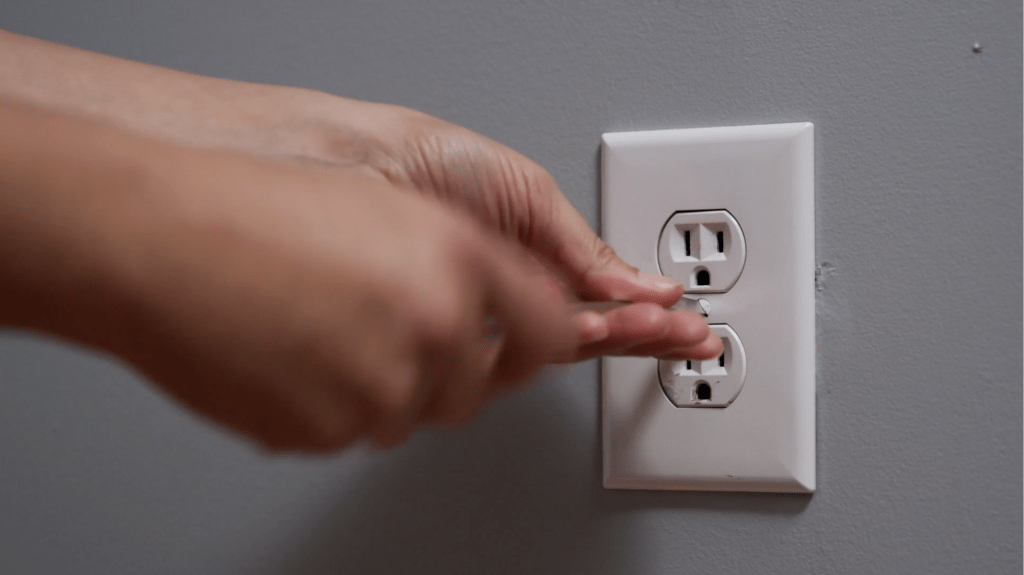
1. Insulate outlets and light switches.
Air can sneak into and out of your home in all kinds of ways, and that’s going to negatively impact your energy bill and decrease your comfort inside. One subtle way air slips in and out is through your outlets and light switches. That’s right, all the non-interior walls in your home with outlets or light switches have tiny gaps around them that cost you money if they’re not properly insulated. The good news is, you can seal those gaps up quickly and affordably just by inserting insulation pads into each outlet or light switch cover. Just unscrew the cover, pop in an insulation pad and then screw the cover back in place. Easy peasy!
2. Weatherstrip doors and windows.
Ready for a jaw-dropping fact? A ⅛-inch gap around an entryway door is the equivalent of drilling a five-inch hole through one of your outside walls. Yikes, that’s the length of a soda can or a one-dollar bill! But with a gap that wide, you’ll be out a whole lot more than $1.
Weatherstripping your doors and windows is one of the most simple and affordable ways to weatherproof your home. To get started, walk around your home and look for any doors and windows where you can see light coming in or where the door or window doesn’t fully fit the frame. Don’t stop at just what you can see, though. Make sure you feel for drafts, and flag those spots too.
Once you’ve identified your drafty spots, head to your local home improvement store to pick up a door sweep, some weatherstripping, caulk and a caulk gun. None of these items should set you back more than $20, and they’re all things you can use or install yourself.
A door sweep fits snugly along the bottom of a door to prevent air leaks. Use weatherstripping anywhere you see gaps. Its soft, flexible material allows you to squeeze it into smaller spaces where it can expand to fill up extra space while keeping the door or window functional. And for those smallest gaps and cracks (remember, even a ⅛-inch gap could be costing you big bucks), use the caulk gun to seal everything up nice and tight.

3. Replace old doors and windows.
Let’s face it, some doors and windows are past their prime. If our DIY weatherproofing tips can’t save your worn-out doors and windows, it’s time to think about getting them replaced. When you do, you could save around 12% on your energy bills.
Before you get overwhelmed with all the options out there, let us simplify a few things. First, connect with a TVA-vetted contractor through our Quality Contractor Network. These contractors are licensed and insured and have been trained to meet TVA’s quality guidelines. Ask about ENERGY STAR certified doors, windows and skylights. Every ENERGY STAR certified product has been independently reviewed to ensure its efficiency performance and savings. And finally, make sure to explore $0 down financing options that may be available to you through your local power company.
4. Plant shade trees.
Calling all green thumbs! This tip actually allows you to better control the temperature of your home from the outside in. Walk around your backyard and look for any south-facing windows and the location of your AC unit. (Don’t know where south is? Download a free compass app on your smartphone!) By planting shade trees 15-20 feet from your home in these areas, you can block out the rays that warm your home and drive your energy bill up.
Your next step:
Connect with a TVA-vetted contractor.
Finding a reliable contractor to complete your home energy upgrades can be stressful. That’s why we created the Quality Contractor Network. It’s free to use and gives you access to hundreds of trustworthy licensed and insured contractors who have been trained to meet TVA’s quality guidelines. So, whether you’re looking for a project estimate or ready to dive straight into money-saving weatherproofing solutions, you can hire with confidence. Plus, TVA EnergyRight will provide a free job inspection after the work is completed. Weatherproofing your home can make a big difference on your energy bill. TVA-vetted contractors can help you start saving sooner.
Find the right contractor for your next home energy project.